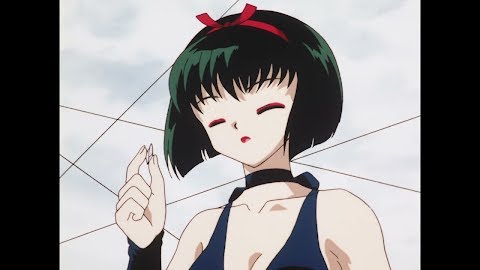
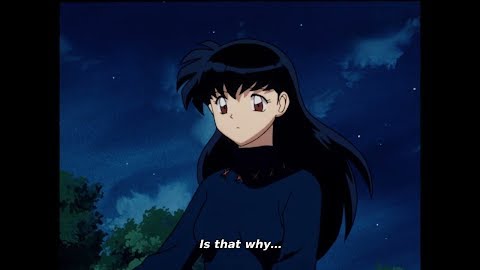
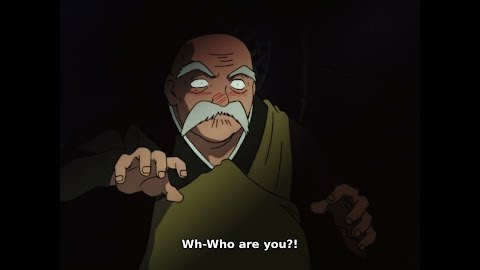
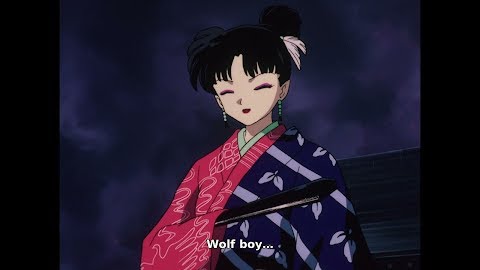
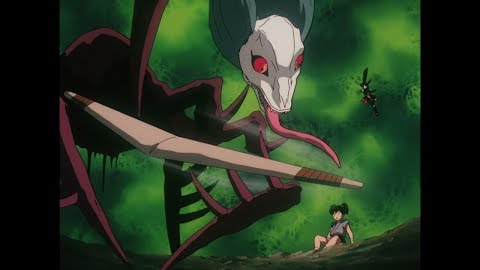
Inuyasha
190 videos
 24m 13s
 The Girl Who Overcame Time…and the Boy Who Was Just Overcome
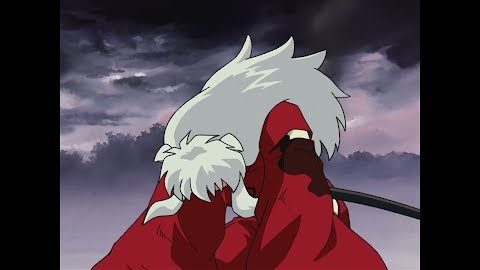
In feudal Japan, the half demon Inuyasha was sealed away by the priestess Kikyo. Many years later he is revived by Kagome, who has slipped through time from the present day. Kagome is surprised when the sacred Shikon Jewel, which makes demons stronger, emerges from a cut on her body.
 24m 14s
 Seekers of the Sacred Jewel
Kagome finds out that she may be the reincarnation of Kaede's late older sister, the priestess Kikyo, who sealed Inuyasha with her arrow. The Carrion Crow demon is after the Shikon Jewel and kidnaps Kagome, but Inuyasha shows up to save her. After Kagome defeats the Carrion Crow with an arrow, the Shikon Jewel shatters into pieces.
 24m 14s
 Down the Rabbit Hole and Back Again
Kagome has the ability to see pieces of the Shikon Jewel. Inuyasha has the power to defeat demons. Both of their powers are needed to gather the shards of the jewel that were scattered, but the two don't get along. The demon Yura, who is after the jewel, manipulates villagers to attack Inuyasha.
 24m 14s
 Yura of the Demon-Hair
Kagome has returned to the present day and is relaxing in her home when Inuyasha comes looking for her. Some of Yura's demonic hair is on his body. Kagome and Inuyasha return to feudal Japan to exterminate the Yura of the hair.
 24m 14s
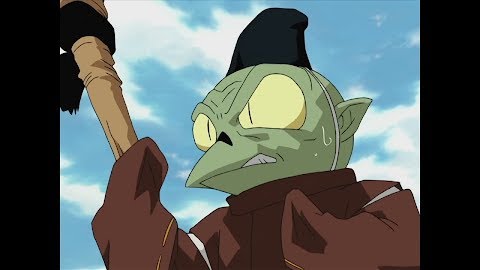
 Aristocratic Assassin, Sesshomaru
Kagome learns that Inuyasha is a half demon, born of a human mother and a dog demon. Inuyasha's half brother Sesshomaru appears, looking for the tomb of their father. In order to manipulate Inuyasha, he brings Inuyasha's dead human mother with him. But the woman turns out to be a demon known as a muonna.
 24m 14s
 Tetsusaiga, the Phantom Sword
The muonna makes Inuyasha reveal the location of his father's grave. Sesshomaru removes Inuyasha's right eye (the black pearl) and opens the entrance to the grave. Kagome is angered by Sesshomaru's cruelty. She goes with Inuyasha after Sesshomaru. Inside their father's tomb is a memento of Inuyasha's father, the sword Tetsusaiga.
 24m 14s
 Showdown! Inuyasha vs. Sesshomaru
Kagome is able to pull out the Tetsusaiga. Sesshomaru tries to kill her, and Inuyasha is angered and fights to protect Kagome. His will to protect a human changes the Tetsusaiga into its true form, a fang sword.
 24m 14s
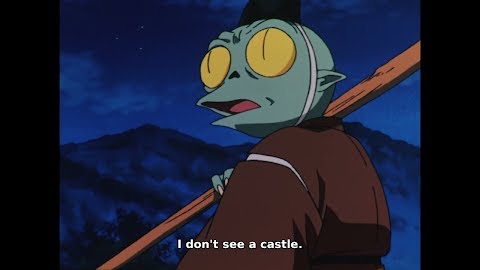
 The Toad Who Would Be Prince
In the Kai Province, there is a young samurai named Nobunaga. He is a clumsy but earnest young man. He has heard rumors about the man that the the princess, his childhood friend, has married. Nobunaga tries to save the lord of the castle who is possessed by a toad demon.
 24m 14s
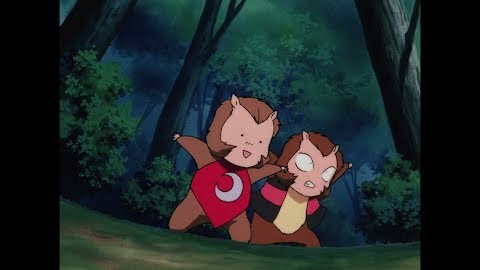
 Shippo and the Thunder Brothers
Shippo is a demon fox whose father was killed by the the Thunder Brothers: Hiten and Manten. He steals the Shikon Jewel shards from Kagome so that he can avenge his father.
 24m 14s
 Phantom Showdown–The Thunder Brothers vs. Tetsusaiga
Inuyasha goes to save Kagome from Manten. Hiten devours the sacred jewel shard that Manten had and absorbs his demon powers. Hiten attacks Inuyasha with his Raigekijin. Inuyasha is in trouble and defends himself with the scabbard of the Tetsusaiga.
 24m 14s
 Terror of the Ancient Noh Mask
Kagome has returned to the present day to take a test. As she does, a noh mask, the Mask of Flesh, begins a violent search for the Shikon Jewel shards. Kagome's younger brother, Sota, tries hard to call Inuyasha to come to Kagome's rescue.
 24m 13s
 The Soul Piper and the Mischievous Little Soul
Kagome sees a Soul Piper, a demon that consoles the spirits of children. She helps Mayu, a girl who is about to become an evil spirit, to pass on.
 24m 13s
 The Mystery of the New Moon and the Black-haired Inuyasha
Half demon Inuyasha's secret is that he becomes human once a month. That day, Inuyasha and the gang meet Nazuna and stay at a mountain temple. They fall into Kumogashira's trap and the sacred jewel shards are taken away from them. Inuyasha is injected with poison!
 24m 13s
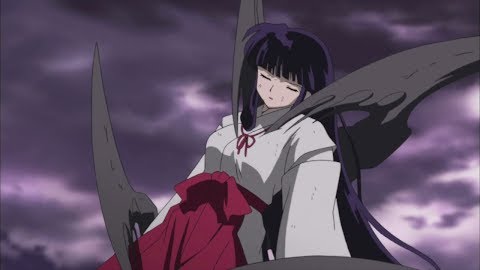
 Kikyo's Stolen Ashes
The ogress, Urasue, robs the grave of Kikyo, the priestess who sealed away Inuyasha fifty years ago. She revives Kikyo's body using the ashes of Kikyo's bones and soil from Kikyo's grave. But Kikyo's soul has already been reincarnated in a different body.
 24m 13s
 Return of the Tragic Priestess, Kikyo
Kikyo is revived when Kagome's soul flows into her. She tries to kill Inuyasha, but Kagome takes back her soul. Fifty years ago, Kikyo wanted Inuyasha to use the Shikon Jewel to become human. But on the day of their promise, someone who looked like Inuyasha fatally injured Kikyo. Inuyasha realizes that there is a mysterious person who made them fight.
 24m 13s
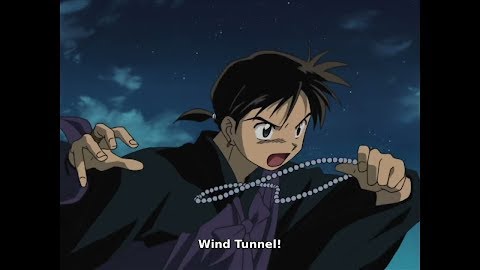
 Mystical Hand of the Amorous Monk, Miroku
Miroku, a womanizing delinquent priest, has been collecting Shikon Jewel shards and steals Kagome's shards. Inuyasha tracks him down and confronts Miroku to get the shards back. Miroku fights back with his priestly powers and the wind tunnel in his hand that he was cursed with.
 24m 13s
 The Cursed Ink of the Hell-Painter
Kotatsu, a painter, sees a dream in which he becomes successful by controlling an army of ogres drawn with ink that has a sacred jewel shard in it. Miroku, Inuyasha and the others become involved in protecting the princess that Kotatsu is in love with.
 24m 14s
 Naraku and Sesshomaru Join Forces
Naraku appears before Sesshomaru and lends him an arm with a sacred jewel shard embedded in it. Sesshomaru attaches the arm to himself and appears before Inuyasha and the gang to steal the Tetsusaiga.
 24m 14s
 Go Back to Your Own Time, Kagome!
Sesshomaru wields the Tetsusaiga with his borrowed arm against Inuyasha, who fights back with his scabbard. When the two strike each other at the same time, Inuyasha gets up close to Sesshomaru, rips off his arm, and gets back the Tetsusaiga. When Inuyasha learns Naraku's plan, he fears that Kagome might die.
 24m 14s
 Despicable Villain! The Mystery of Onigumo!
Kagome has her sacred jewel shards taken away from her and is returned to the present day, unable to return to feudal Japan. Back to her normal life, she agrees to go on a date with Hojo. Meanwhile, Inuyasha and the gang try to find out more about the mysterious Naraku.
 24m 14s
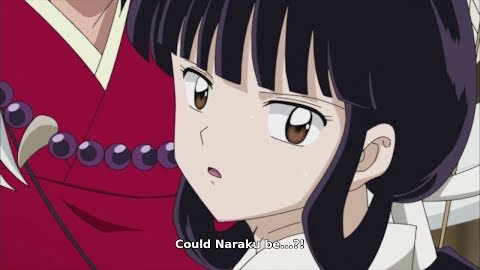
 Naraku's True Identity Unveiled
Kagome returns to the shrine in the middle of her date with Hojo. She senses the presence of the Shikon Jewel shards and returns to feudal Japan. Naraku reveals that fifty years ago, Onigumo was in love with Kikyo. The demons that were drawn to Onigumo by his malice devoured Onigumo, and the demon Naraku was born.
 24m 14s
 A Wicked Smile; Kikyo's Wandering Soul
Kikyo, who was brought back to life, is living as a priestess. A monk, who realizes that Kikyo is dead, tries to make Kikyo pass on, but Kikyo ends up killing him. Inuyasha saves the monk's disciples and runs to Kikyo when he hears the priestess's name.
 24m 14s
 Kagome's Voice and Kikyo's Kiss
Kikyo paralyzes Kagome. Inuyasha appears before her. Kikyo has been gathering the souls of dead girls. She vents her grudge against Inuyasha. Inuyasha reveals that he has never forgotten her. When Inuyasha kisses Kikyo, Kikyo tries to drag him to hell. But Inuyasha hears Kagome's voice and regains consciousness.
 24m 14s
 Enter Sango, the Demon Slayer
Sango, a demon slayer, is invited to Hitomi Castle along with her father, the leader of the demon slayers, and her younger brother, Kohaku. But it is a trap. Meanwhile, the undefended village is attacked by a horde of demons and annihilated. Naraku takes the Shikon Jewel shards that they had been gathering and leaves.
 24m 14s
 Naraku’s Insidious Plot
Sango fights Inuyasha, believing him to be her enemy. Naraku's plan is to have her fight to the death using the power of the Shikon Jewel shard. But Sango listens to Kagome and is no longer suspicious of Inuyasha.
 24m 14s
 The Secret of the Sacred Jewel Revealed!
Sango reveals the secret story of the Shikon Jewel's birth. Midoriko, a priestess with powerful spiritual powers, fused with many demons after a battle to the death. She absorbed the souls of the demons into her own, punched out her soul, and died. Her soul is the Shikon Jewel.
 24m 14s
 The Lake of the Evil Water God
Inuyasha and the gang meet Taromaru, the son of a village leader. They go to the Temple of the Water God, where children are being sacrificed. The Water God has a sacred treasure and toys around with the group.
 24m 13s
 Miroku Falls Into a Dangerous Trap
A demon injures Miroku's Wind Tunnel. Miroku visits the temple of Mushin, the man who raised him, for help treating the injury. Mushin is possessed by an Urn Grub and attacks Miroku. Furthermore, Miroku is paralyzed and is surrounded by many demons.
 24m 13s
 Sango’s Suffering and Kohaku’s Life
Sango's younger brother, Kohaku, who's supposed to be dead, is alive. Naraku reveals that Kohaku is living because of a sacred jewel shard that is planted in his back.
 24m 13s
 Tetsusaiga is Stolen! Showdown At Naraku's Castle!
Sango steals the Tetsusaiga and is led to Naraku's castle. Sango tries to use the opportunity to kill Naraku, but she is seriously injured by an attack from Kohaku. Inuyasha and the gang catch up to her, but they are in danger from Naraku's miasma.
 24m 14s
 Jinenji, Kind Yet Sad
Kirara has been weakened by Naraku's poison. Inuyasha and Kagome go looking for an antidotal herb. Jinenji, a demon who is protecting an herb field, is actually a half demon and is picked on by the villagers because of his weakness.
 24m 14s
 Kikyo and Inuyasha, Into the Miasma
Inuyasha and Miroku come across a cave when they go looking for the source of a strong evil presence. The Fuko no Jutsu has been placed on the cave. Hundreds of demons will fight to the death and are absorbed by the victors.
 24m 14s
 Kikyo, Captured by Naraku
Inuyasha and the gang go to save Kikyo. They are struck with Death by Illusion, a demon technique. Kagome is not affected by the technique. Kikyo takes away her Shikon Jewel shards and tries to kill her…
 24m 14s
 Tetsusaiga and Tenseiga
The Tenseiga and the Tetsusaiga, two great swords that were forged by swordsmith Totosai, have been left to Sesshomaru and Inuyasha by their father. Sesshomaru wants a sword to fight with and is unsatisfied with the Tenseiga, a healing sword.
 24m 33s
 The True Owner of the Great Sword!
Inuyasha's eye is closed by poison from Sesshomaru's claws. He relies on the smell of demon energies clashing to find the wind scar. He releases his sword's true power and forces Sesshomaru to withdraw. Totosai accepts Inuyasha as Tetsusaiga's owner.
 24m 33s
 Kagome Kidnapped by Koga, the Wolf Demon!
Koga is the young leader of the demon wolf tribe, whose wolf minions were killed by Inuyasha. He places Shikon Jewel shards in his arms and legs, which he uses as weapons, making him an even match with Inuyasha. But it's Kagome who intrigues him…
 24m 33s
 The Man Who Fell In Love With Kagome!
Koga and the demon wolf tribe begin their attack on the Birds of Paradise. Kagome senses that the sacred jewel shard is in the mouth of the brothers who lead the Birds of Paradise and tells Koga. Koga and the Bird of Paradise brothers fight for each other's shards.
 24m 33s
 Two Hearts, One Mind
Kagome is angry that Inuyasha is suspicious of her relationship with Koga and returns to the present day. She goes back to school for the first time in a while, where she has to deal with the advances of yet another suitor.
 24m 32s
 Trapped In A Duel To The Death!
Kagura, a wind-using demon, used rumors of Shikon Jewel shards to draw out demon wolf tribe members and kill them. She lures Inuyasha and the gang out and attacks them with the corpses of the demon wolf tribe members.
 24m 33s
 The Deadly Trap of Kagura the Wind Sorceress!
At the end of a desperate struggle, Koga corners Inuyasha, but he is extremely weakened by the poisonous shard in his arm. Kagura appears and controls the wind in the battlefield. Inuyasha stands up, but she tosses him about.
 24m 32s
 Kagura’s Dance and Kanna’s Mirror
Miroku is reunited with Koharu, a girl he once made advances on. He leaves her in a certain village, where Kanna, the older sister of Kagura, appears. Kanna steals Koharu's soul with a soul-sucking mirror, and Koharu is manipulated along with the villagers into attacking Inuyasha and the others.
 24m 32s
 The Wind Scar Fails
Kanna's mirror fails to absorb Kagome's soul, probably because of its size, but it reflects Inuyasha's Wind Scar, the Tetsusaiga's special technique. Inuyasha is injured by the blast of wind blasted back at him. Then Naraku appears.
 24m 32s
 Tetsusaiga Breaks
Kikyo gave the sacred jewel shards she had stolen from Kagome to Naraku. She appears before Inuyasha and tells him not to kill her until she is wiped out along with the Shikon Jewel and Naraku.
 24m 32s
 Kaijinbo’s Evil Sword
Totosai repairs the Tetsusaiga using one of Inuyasha's fangs. Meanwhile, Sessomaru takes the fangs of the deceased Goshinki to swordsmith Kaijinbo. He brings the fangs back to life with the Tenseiga.
 24m 32s
 Sesshomaru Wields Tokijin
Kaijinbo the swordsmith, manipulated by the sword Tokijin, charges at Inuyasha. In the end, he is wiped out by the force of the Tetsusaiga. All that is left is the Tokijin, which is untouchable because of the evil energy it emits.
 24m 32s
 Juromaru and Kageromaru
Naraku's new minions, Juromaru and Kageromaru, attack Inuyasha and the gang. Koga comes to save Kagome from danger. He fights the two demons as he bickers with Inuyasha, but he struggles against Kageromaru, who digs underground.
 24m 32s
 Onigumo’s Heart Still Beats Within Naraku
Because of the incident with Koga, Kagome has a fight with Inuyasha and goes back to the present day. Meanwhile, Naraku wants to get rid of Onigumo's feelings for Kikyo by sending a giant Shinidamachu to kill Kikyo.
 24m 32s
 Return to the Place Where We First Met
Kagome returns to the present day. She senses that Inuyasha has chosen Kikyo and wonders if she can ever go back to the past, but she still has the Shikon Jewel shards. She decides to give them back and put everything to an end, until she remembers her first meeting with Inuyasha when she stands before the Sacred Tree in the present day.
 24m 32s
 Kohaku’s Lost Memory
Sango finds the bodies of her father and the other slayers at the ruins of Naraku's castle. Her brother Kohaku is nearby but can only remember that he escaped the castle.
 24m 32s
 That Unforgettable Face!
Sango's brother Kohaku is being manipulated by Naraku and is after Kagome's life. Inuyasha and the gang have been separated from Kagome, but Kohaku doesn't take Kagome's life. Sango rushes over and tries to kill Kohaku and herself in order to free him from Naraku's control, but Inuyasha stops her.
 24m 32s
 Inuyasha’s Soul, Devoured
Just as Inuyasha and the gang overcome Naraku's trap involving Kohaku, Sesshomaru, who is investigating the secrets of Inuyasha's transformation, is visiting Bokusenno, a demon tree whose wood was used to make the sheaths for the Tetsusaiga and the Tenseiga.
 24m 33s
 The Demon’s True Nature
Inuyasha transforms into a demon when his life is in danger. He quickly destorys Gatenmaru, who has become a giant moth. He attacks the escaping bandits with his claws, and he cannot hear Kagome trying to stop him.
 24m 33s
 Father’s Old Enemy: Ryukotsusei
Inuyasha visits Totosai's workplace by himself. The Tetsusaiga was broken by Goshinki, and Inuyasha's own fang was used to repair it. Inuyasha's fang isn't compatible with that of his great demon father, so the Tetsusaiga has become heavier.
 24m 33s
 The Backlash Wave: Tetsusaiga’s Ultimate Technique
Ryukotsusei knocks away the Tetsusaiga, and Inuyasha transforms into a demon. Totosai tells everyone to retreat because they are in danger, but Kagome decides to stay behind.
 24m 33s
 The Stone Flower and Shippo’s First Love
In a certain village, Shippo meets a girl named Satsuki. Satsuki believes that her brother, who went to war, will come back. She shows Shippo the treasure her brother gave her, a sacred jewel shard. Unfortunately, it is only a flower made of stone.
 24m 33s
 Temptress in the Mist
Husbands are being lured away from their village by a beautiful demon. Their wives ask Miroku to defeat the demon. Worried about him, Sango accompanies him. But Sango is separated from him by an odd mist.
 24m 33s
 Fateful Night in Togenkyo, Part 1
Sango goes back to the slayer village in order to fix her Hiraikotsu, and Kagome goes back to the well so she can return to the present day. Along the way, she finds a Nimenka, a fruit that looks like a face.
 24m 33s
 Fateful Night in Togenkyo, Part 2
Tokajin kidnaps Kagome from his miniature garden. Inuyasha is able to escape from the miniature garden with the help of Miroku and the others, and goes to save Kagome. As he escapes, he finds a flower with an old sage's face on it.
 24m 33s
 The Beautiful Sister Apprentices
Sango returns to the demon slayer village and repairs her Hiraikotsu. She also lays her father and her comrades' ashes to rest. When she is about to leave, she is attacked.
 24m 33s
 The 50 Year-old Curse of the Dark Priestess
Naraku calls upon a priestess named Tsubaki. Fifty years ago, Tsubaki was defeated by Kikyo when she went after the Shikon Jewel. She is a dark priestess who sold her soul to a demon to maintain her youth and is now after Kagome's blood.
 24m 32s
 Kikyo and the Dark Priestess
Kagome desperately fights the curse placed on her by Tsubaki, a dark priestess. Meanwhile, Kikyo appears before Tsubaki. Tsubaki is surprised and cuts off her curse.
 24m 32s
 Tsubaki's Unrelenting Evil Spell
Tsubaki's curse steals Kagome's consciousness. Kagome forgets feudal Japan in an illusory world.
 24m 32s
 The Red and White Priestesses
Tsubaki visits the onmyoji mansion where she once trained. She plans to open a forbidden door in order to train an ogre that was sealed away in the pagoda with the power of the Shikon Jewel. Momiji and Botan, two young priestesses, are tricked by Tsubaki into fighting off Inuyasha and the others.
 24m 32s
 Giant Ogre of the Forbidden Tower
Tsubaki is a priestess who was considered to be on par with Kikyo. She was jealous that the Shikon Jewel was not entrusted to her, so she became a dark priestess. Inuyasha and the others defeat Tsubaki's shikigami, but Tsubaki has already broken the forbidden seal and called forth the demon.
 24m 32s
 Farewell Days of My Youth
One night, someone possesses Sango to attack Miroku. The group examines the centipede demon that they suspect was behind it, but they are mistaken. Miroku is possessed next and attacks Sango. Shippo tries to flee, but is cornered by a small shadow.
 24m 33s
 Naraku’s Barrier - Kagura’s Decision
There is a rift in Naraku's barrier. But it's the beginning of the month, and when night falls, Inuyasha loses his demon powers, and the search for Naraku is called off.
 24m 33s
 The Howling Wind of Betrayal
Kagura approaches Sesshomaru and tells him to kill Naraku, but Sesshomaru refuses. As Inuyasha and the others search for Kagura, they realize that Naraku is a half demon. They find Kagura, but Koga is badly injured, and Inuyasha shows his human form to save him.
 24m 33s
 Shippo Gets an Angry Challenge
Shippo is sent a letter challenging him to a battle. The letter's sender is Soten Raijyu, and he is still just a child. He investigated Inuyasha and the others and determined that they were too strong, so he focuses his attention on Shippo.
 24m 33s
 Terror of the Faceless Man
A demon born from a piece of flesh that Naraku discarded transforms into a man without a face and steals the handsome face of Muso, a traveling monk. The demon calls himself Muso and slaughters and plunders along his way to Kaede's village.
 24m 33s
 Onigumo's Memory Restored
Muso attacks Kagome. Inuyasha destroys him with his Wind Scar. Naraku, who was watching the event, tells Kagura to tell Inuyasha where Muso went. After Inuyasha and the others leave, Muso regenerates.
 24m 32s
 Three-Sided Battle to the Death
Muso regenerates even thought he was hit with the Wind Scar. Miroku tells Inuyasha that Muso has a heart in the area where he has a spider marking. But Kagura interferes, and the hell wasps take away Muso's shard.
 24m 32s
 Totosai's Rigid Training
Inuyasha visits Totosai in search of a technique that can break through Naraku's barrier. There he meets Bunza, a wildcat-demon child. The two do as Totosai orders them. Bunza acts as if he's the older disciple, but ends up collapsing.
 24m 32s
 Shiori's Family and Inuyasha's Feelings
Myoga comes to deliver a message from Totosai. He says that the Tetsusaiga will become stronger if it cuts a Hyakki Bat, a demon that can create a powerful barrier. Inuyasha and the gang search for the Hyakki Bats' nest, which is near the sea.
 24m 32s
 The Red Tetsusaiga Breaks the Barrier!
The Hyakki Bat demon Otakemaru tries to destroy the village along with Shiori's mother. Inuyasha is blocked by Shiori's barrier and cannot defeat Otakemaru. Shizu asks Otakemaru to respect the will of her late husband, Tsukuyomaru, and save the village.
 24m 32s
 The Plot of the Panther Devas
The Panther Tribe attacks from the west. Their goal is to get the Shikon Jewel shards that Kagome has, as well as to get revenge on Sesshomaru and Inuyasha, the sons of the Dog General. The Four Panther Divas use unusual techniques and kidnap Kagome…
 24m 32s
 Target: Sesshomaru and Inuyasha
Inuyasha slices through the Panthers' barrier with his red Tetsusaiga, and Inuyasha and Koga make their way into the castle town. Meanwhile, Miroku and Sango have fallen under the Divas' spell, and Kagome is being held in a prison.
 24m 32s
 The Panther Tribe and the Two Swords of the Fang
The Panther King, the general of the Panther Tribe, begins to move with the power of the Shikon Jewel. Inuyasha and Sesshomaru attack the mummy. As they do, Koga, Miroku, and the others lead Kagome and the other people to a safe location.
 24m 32s
 Only You, Sango
Sango is asked to slay a demon by a young lord named Kuranosuke, who fell in love with her six years ago. Kuranosuke has looks, status, and wealth. Sango is confused as to how she will turn down his marriage proposal. Meanwhile, Kagome is cheering on the relationship between Miroku and Sango.
 24m 32s
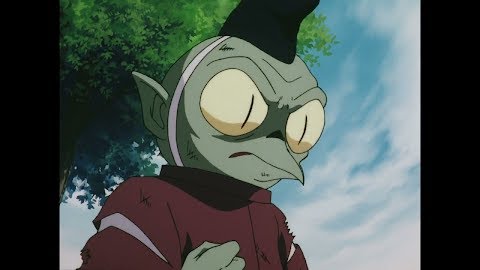
 Jaken's Plan to Steal Tetsusaiga
The Tetsusaiga is equipped with a technique that can break through barriers. Jaken plans to steal it from Inuyasha, but his plans continually fail. Rin is disgusted. Jaken chases her away and lures Inuyasha to a hot spring, and manages to steal the Tetsusaiga.
 24m 32s
 Sesshomaru and the Abducted Rin
Naraku tells Sesshomaru that he'll give Rin back if he kills Inuyasha, but Sesshomaru charges into Naraku's castle instead. Meanwhile, Kagome detects the presence of the Shikon Jewel. Inuyasha leaves Kagome and the others to find the shard, while he looks for Naraku's castle by himself.
 24m 32s
 Vanishing Point; Naraku Disappears
Naraku is trying to absorb Sesshomaru so that he can get the powers of a complete demon. But Inuyasha breaks through his barrier and interferes. When Naraku sees that the tables have been turned, he retreats behind his miasma.
 24m 32s
 Gap Between the Ages
Kagome returns to the present day. She is busy preparing for a mock exam two days later. Meanwhile, Sango is concerned about Kohaku, who was taken away by Kagura. Miroku is considerate to Sango, but he gets slapped because of his lecherous ways.The group has lost track of Naraku, and everyone is spending their time in their own way.
 24m 32s
 The Female Wolf-Demon and the Lunar Rainbow Promise
Ayame, a female demon wolf, appears before Koga and tells him that she is his fiancée. But Koga is madly in love with Kagome. He runs away. Koga stops by at Naraku's castle. Ayame goes after him, and is attacked by a hair monster there. Meanwhile, Koga has caught up with Inuyasha and the gang.
 24m 32s
 Koga's Bride-To-Be
Ayame brought Koga to stop her comrades' fighting. But she has no intention of returning to Koga. The monster that was after the Sacred Jewel shards then attacks. Koga fights to protect Kagome and Ayame.
 24m 32s
 The Evil Within Demon's Head Castle
Inuyasha and the gang meet an old lady who's a seemingly fake purifier. In order to find out why so many demons have appeared recently, they go to Ogre's Head Castle to fight ogres. The lord of the castle is being possessed by an ogre. Inuyasha fights the ogre head that appears in the castle, but the wind scar doesn't work against him.
 24m 32s
 Secret of the Possessed Princess
Inuyasha fights the lord of Ogre Castle. Sanfo hears that Miroku has gone to the basement with the princess, and goes after him with the old purifier. Kagome finds the corpse of the real princess in the lord's bedroom.
 24m 32s
 Kikyo's Lonely Journey
Kikyo looks for Naraku. She meets Kansuke, an old bandit. Kansuke has a serious illness and is trying to find a place to die. Fifty years ago, he was convinced by one of his bandit buddies, Onigumo, into attacking a priestess who protected the Sacred Jewel. He failed and lost his right eye.
 24m 32s
 The Three Sprites of the Monkey God
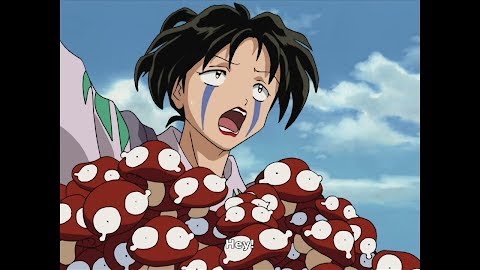
Inuyasha and the gang accept a job to get rid of monkeys who are destroying fields. They meet three monkeys, Gon, Bun, and Ken. The three are monkey spirits. They say that they have been destroying the field to find a divine vessel that houses the monkey god.
 24m 32s
 Nursing Battle of the Rival Lovers
Kagome catches a cold and returns to the present day. Inuyasha is worried about her. He gathers lots of nutritious food. As he does, he defeats demons who get in his way.
 24m 32s
 Sota's Brave Confession of Love
Kagome's younger brother, Sota, has fallen in love. He has fallen in love with Hitomi, one of his classmates. At first, he asks Inuyasha for manly advice, but in the end, he decides to tell her he loves her with a plan orchestrated by Kagome.
 24m 32s
 The Suspicious Faith Healer and the Black Kirara
Tesso, a mouse demon who is afraid of cats, transforms into a faith healer, and chases out Kuroro, a Nekomata who is bothering him. Inuyasha and his gang come across villagers who mistake Kirara for Kuroro and try to chase her out.
 24m 32s
 Plot of the Walking Dead
Kikyo was brought back to life by one of Urasue's secret techniques. She meets Monju, who is in the same situation. Monju doesn't have enough souls of the dead. He regains his vigor when he is given the souls that the Shinidamachu bring…
 24m 32s
 The Mysterious, Lecherous Monk
In a certain village, Inuyasha and the gang are surrounded by villagers who dislike Miroku. When they ask why, they say that Miroku has been doing many evil deeds. Miroku says that he is innocent, and suspects that it is the doing of an impostor…
 24m 32s
 The Sacred Jewel Maker Part 1
Inuyasha and the gang meet Izumo, who is investigating the secret of the creation of the Sacred Jewel. They hear that a demon has appeared, and go to investigate a nearby village. They meet a boy named Kosuke. Orochi Dayu kidnapped Kosuke's parents and the villagers. He is also after the real Sacred Jewel shards that Kagome has...
 24m 32s
 The Sacred Jewel Maker Part 2
Kagome and the others are kidnapped by demons who are using fake Sacred Jewels. Inuyasha and the rest go to save them, but Gyuoh stands in their way. Gyuoh was born between a human father and a demon cow mother. During the day he is Izumo, a human. At night, he becomes Gyuoh, a half-demon...
 24m 32s
 Jaken Falls Ill
Naraku's poisonous bugs appear. Sesshomaru goes after them. Meanwhile, Jaken is stung by a poisonous bug and is dying. Rin is left with him. She tries to save him. She heads to Jinenji's field to get a fruit of the Sennenso. But Jinenji, a half-demon, has become human...
 24m 32s
 Kirara Come Home!
Kirara disappears. Sango is worried. Shippo deduces Kirara's reasons for disappearing. He blames Inuyasha and the others, and urges them to be repentant. At that moment, a thundering sound comes from the forest. Inuyasha and the others rush on over. They help a man being chased by demons get away, and find the scarf that Kagome gave Kirara amongst the scattered bones!
 24m 33s
 Kikyo and Kagome: Alone in the Cave
Kagome is lured to a cave by a voice calling for help. Kagome enters the cave and meets Kikyo. Kikyo doesn't haven enough souls of the dead and has become weakened. Kagome tries to escape from the cave, but Kikyo tells her that it's useless. Thye are actually within the demon called the Priestess Sealer...
 24m 33s
 Koga and Sesshomaru: A Dangerous Encounter
Ginta and Hakkaku fight with Koga over something small, and end up working separately from him. As they do, they meet Sesshomaru's group. They see Rin, the girl with Sesshomaru, and remember the incident when their comrades attacked her. They think that it would be bad if Koga and Sesshomare were to meet, but they fail to keep that from happening...
 24m 33s
 The Truth Behind the Nightmare: Battle in the Forest of Sorrow
Garamaru, a poisonous moth demon, has trapped Kagome and the others in a cocoon. Kagome and the others are each suffering within their nightmares. In real life, Inuyasha is fighting by himself. He finally defeats Garamaru, but the cocoon doesn't disappear. Kagome and the others begin to transform into moths within the cocoons...
 24m 33s
 The Snow from Seven Years Past
Snow is falling out of season. Miroku is abducted by Koyuki, a mysterious woman. Kagome and the others hear from a hunter and his wife about a snow demon. When they go looking for him, they find Sango, who had gotten lost. Meanwhile, Miroku is being led by Koyuki. He is greeted by many children and babies. Koyuki tells Miroku that they are his children...
 24m 33s
 Assault on the Wolf-Demon Tribe!
A giant ogre appears in the mountains to the north. His name is Kyokotsu. Kyokotsu eats demons when he can. He attacks the demon wolf tribe. Koga sees Imawa, an old wolf become seriously injured. To avenge his comrades, he goes to the mountains to the North...
 24m 33s
 The Band of Seven Resurrected!
The Band of Seven, a group of ghosts, have been brought back to life. A calvary sent to defeat them, is decimated by the Band of Seven's second strongest, Jakotsu. Inuyasha and Miroku catch up to Jakotsu, who immediately takes a liking to them and casts amorous glances at them...
 24m 32s
 The Stealthy Poison Master: Mukotsu!
The match between Jakotsu and Inuyasha is stopped when Mukotsu interferes. Mukotsu kidnaps Kagome to make her his bride. Miroku and Sango try to save Kagome, but Mukotsu's poison makes them unable to move. Sesshomaru, who is looking for Naraku, appears and defeats Mukotsu for being in his way...
 24m 32s
 The Ghastly Steel Machine!
Kagome, Miroku, and Sango have been weakened by Mukotsu's poison. Inuyasha is tries to draw attacks away from them as he fights Ginkotsu of the Band of Seven. Shippo takes Kagome and the others away, and arrives at a temple, but Renkotsu of the Band of Seven has placed a trap there...
 24m 33s
 Kagome, Miroku, and Sango: Desperate Situation!
At the temple, Inuyasha checks to see of Kagome and the others are safe. He ends up trusting Renkotsu. Ginkotsu bombards him. Inuyasha faces him, but as he does, Renkotsu steals the Sacred Jewel shards from Kagome and sets the temple on fire…
 24m 33s
 Inuyasha Shows His Tears For The First Time
Kagome, Miroku, and Sango have stopped breathing. Inuyasha searches for the Band of Seven to avenge them. He meets Sesshomaru, and becomes sure that it's an illusion. But Sesshomaru has come after Kohaku, and is nearby…
 24m 33s
 The Secret of the Pure Light
Inuyasha and the gang approach the light of a Sacred Jewel which appears to belong to the Band of Seven, but the light is not corrupt. Suikotsu, a good doctor owns the shard…
 24m 33s
 Hidden in the Mist: Onward to Mt. Hakurei!
Suikotsu's Band of Seven personality awakens and fights Inuyasha. When the children call out to him to turn back, he holds his head in pain. Renkotsu decides to retreat from the village. Meanwhile, Kagome realizes that the Shinidamachu cannot get near the holy barrier...
 24m 33s
 Enter Bankotsu, The Leader of the Band of Seven
There is a barrier around Mt. Hakurei that purifies demons or anything evil. Inuyasha and the others think that Naraku cannot be hiding in Mt. Hakurei, and go looking for a different clue. Meanwhile, the surviving Band of Seven members are reunited with their leader, Bankotsu...
 24m 33s
 The Big Clash: Banryu versus the Wind Scar
The battle between Bankotsu and Inuyasha begins. Meanwhile, Sesshomatu comes to Mt. Hakurei. He is blocked by the holy barrier, and turns back. But there are demons within the holy ground.
 24m 33s
 Afloat on the Lake Surface: the Barrier of Hijiri Island
There is a holy island in a lake surrounded by mist. Saint Hakushin, who become a living Buddha a hundred years ago, is venerated there. But something strange happens. The father of a boy named Shintaro goes to investigate, but he doesn't come back. I
 24m 33s
 The Sacred Vajra and the Mystery of the Living Buddha
Bankotsu gets Kagome and the others involved in his battle with Inuyasha. Inuyasha is angered that his friends are getting hurt, and corners Bankotsu. But Saint Hakushin's vajra protects Bankotsu and turns the Tessaiga back into a rusty sword.
 24m 33s
 Koga's Solitary Battle
Mt. Hakurei's holy barrier prevents demons from entering it. Saint Hakushin helped Naraku, and placed the barrier. Koga tries to find a way to beak through, but fails. Renkotsu and Ginkotsu show up to get Koga's Sacred Jewel shards.
 24m 33s
 Lured by the Black Light
Mt. Hakurei gets stronger, and Kikyo is prevented from going into its hold ground. Kikyo leaves Chiyo's village, but she goes after Bankotsu to see where fellow deceased, the Band of Seven, are doing. Jakotsu and Suikotsu attack Sesshomaru, and kidnap Rin
 24m 33s
 The Exposed Face of Truth
Suikotsu cannot kill Chiyo and the others. Jakotsu stops him. He senses an attack from Sesshomaru. Suikotsu and Jakotsu move within the holy realm, and wait for Sesshomaru. Sesshomaru's movements are slow because of the holy ground, but he skewers Suikotsu with his Tokijin, and slashes Jakotsu's chest with his claws.
 24m 33s
 Vanished in a River of Flames
Ginkotsu has died, and Renkotsu uses his shard without permission. In doing so, he has betrayed Bankotsu. He cannot go back anymore. He lusts for even more power and attacks Koga so that he can take the Sacred Jewel shards that he owns.
 24m 33s
 Into the Depths of Mt. Hakurei
The evil within Mt. Hakurei is Naraku's demons and Kagura. Miroku risks his life to save Sango, by opening his Wind Tunnel and sucking in the demons along with the poisonous bugs. But he uses up his power and collapses. Inuyasha is concerned about Miroku and Sango.
 24m 33s
 Divine Malice of the Saint
Miroku and Sango come face to face with the Saint Hakushin's mummy on Mt. Hakurei. The saint tells them his reason for helping Naraku. Miroku tells him that he doesn't blame him, but that he cannot allow the barrier to protect Naraku.
 24m 33s
 Fare Thee Well: Jakotsu's Requiem
Inuyasha regains his demon powers. He defeats Jakotsu, and hurries to Mt. Hakurei. Renkotsu has rebellious feelings towards Bankotsu. He kills Jakotsu while he's injured and takes his shard. Meanwhile, Kikyo comes face to face with the mummy of Saint Hakushin.
 24m 33s
 Final Battle: The Last and Strongest of the Band of Seven
Mt. Hakurei's barrier disappears. Inuyasha is worried about Kagome. Kagome heads to Mt. Hakurei with Koga and the others. Meanwhile, Kikyo and Sesshomaru have sensed that something strange has happened from different locations. As Mt. Hakurei rumbles, Inuyasha and Bankotsu begin to fight within the mountain.
 24m 33s
 Beyond the Darkness - Naraku Reborn!
Naraku has gained a new body and has been reborn. Inuyasha tries to defeat him with a Wind Scar, but catches the force of his attack and flings it at Kagome, Miroku and the others. Meanwhile, Kikyo sees Kagura escaping from Mt. Hakurei.
 24m 33s
 Farewell Kikyo, My Beloved
Mt. Hakurei is destroyed. Koga falls to the bottom of it. Inuyasha saves him. As he goes to meet up with Kagome and the others, who are trying to escape as quickly as possible, he sees an illusion of Kikyo.
 24m 33s
 The Darkness in Kagome's Heart
Inuyasha is pulled away from his friends when he is tricked by fake information that Kikyo is still alive. Meanwhile, Kagome and the others are at a certain castle town. They are reproached and captured. Kagome is called to the castle, by herself.
 24m 33s
 Don't Boil It! The Terrifying Dried-Up Demon!
In feudal Japan, Naraku has sent a demon called Mimisenri to look for the Sacred Jewel shards. Meanwhile, Kagome returns to the present day, and finds that the school is in the middle of preparing for the cultural festival. Kagome ends up helping out with the festival.
 24m 9s
 Battle Against the Dried-Up Demons at the Cultural Festival!
On the day of the cultural festival, the dried demons that Kagome brought from feudal Japan are revived. They devour the food that Yuka and the others made. Kagome covers up the emergency with food from the convenience store.
 24m 8s
 Chokyukai and the Abducted Bride
A demon named Chokyukai is revived, and begins to steal girls. A young man named Kisuke comes to Kaede for help. Inuyasha go to defeat the demon. When they arrive at Kisuke's village, Chokyukai appears leading a water imp and a monkey.
 24m 9s
 Shippo's New Technique, The Heart Scar!
Five demon fox brothers believe Shippo to be a hero. They become his disciples to learn his special technique, the Wind Scar. Shippo is unable to teach it to them, but he tries to show off and fool them. He tricks Mizuki, a girl that he had become friends with recently, and makes her angry.
 24m 9s
 Trap of The Cursed Wall Hanging
Inuyasha and the gang meet Shinosuke, who is looking for his fiancée. They are led to a village of only women, and are separated by sex into their rooms. Kagome is left together with Sango. She asks Sango about her relationship with Miroku.
 24m 9s
 Miroku's Most Dangerous Confession
At a village where only women live, a demon that was sealed away in a hanging scroll at Kanondo is revived. The demon merges with his main body, which had sunk to the bottom of the river, and shows his true form, a salamander demon.
 24m 26s
 The Woman Who Loved Sesshomaru, Part 1
Sara, a mysterious woman, appears before Sara. Sara was once saved by Sesshomaru. She was reincarnated just as she had died from an illness. She has stolen Inuyasha's Tessaiga, and turned Miroku and Sango into glass statues.
 25m 22s
 The Woman Who Loved Sesshomaru, Part 2
Sara asks Sesshomaru to destroy her along with the spirit. Sesshomaru complies, and uses the Tessaiga to destroy Sara along with the spirit. Sara accepts her fate. Inuyasha and Kagome watch her final moments.
 24m 9s
 The Last Banquet of Miroku's Master
Priest Mushin, the person who raised Miroku, is going to die. Miroku and the others are shocked. They ask to Mushin's what he wants so that they can give him one last gift. He says that he will have no regrets if he gets to drink “Mist Sage” a wonderful sake that is brewed by the Sake Sage.
 24m 9s
 A Strange Invisible Demon Appears!
A treasure stealing invisible demon appears. An old lady who failed to defeat him asks Inuyasha and the gang for help. Inuyasha are in charge of guarding the second biggest mansion in town.
 24m 9s
 An Ancestor Named Kagome
Akitoki, Hoji's ancestor is on a journey to offer the Hojo family heirloom, the Kenkon Naginata, a demon sword that brings disaster. Inuyasha and the gang travel accompany him. People who are after the Kenkon Naginata appear.
 24m 9s
 Mountain of Demons: Survival of the Duo
The Ken blade brings disaster. Akitoki and Inuyasha travel the shrine of the wind and thunder gods to make an offering to seal away the blade's demon powers. But Hoshiyomi's demon ninjas attack in order to steal the blade.
 24m 9s
 The Great Duel at Shoun Falls!
Hoshiyomi uses the Kon blade to steal the Tessaiga's demon powers. He captures Kagome, and tells Inuyasha to come to the shrine of the wind and thunder gods.
 24m 9s
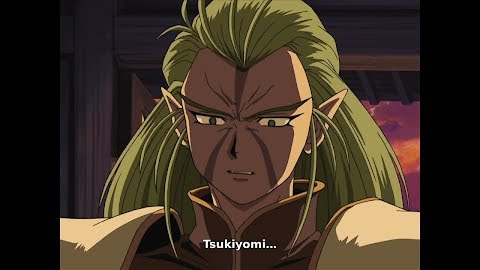
 Eternal Love: The Naginata of Kenkon
Tsukiyomi, who is supposed to be dead, possesses Kagome and appears before Hoshiyomi. Having misgivings about the terror of the Kenkon Naginata, Tsukiyomi stole the naginata from Hoshiyomi.
 24m 9s
 Entei, The Demon Horse Unleashed!
Naraku's baby is bringing virtuous priests close to death and peering into their minds. He is trying to peer into the space between this world and the next. Inuyasha and the gang hear rumors about this and sense that it is the doing of Kagura and the baby.
 24m 9s
 Untamed Entei and Horriible Hakudoshi
Naraku's baby was split into two. One half comes back to life in the form of a child dressed in white. Entei is reunited with its owner, Rengokuki, but when the child dressed in white shows up and defeats Rengokuki, Entei chooses the child as his new rider.
 24m 9s
 3000 Leagues in Search of Father
Kanta is an otter demon child. His father's head was taken by Hakudoshi, and he is looking for his father's body. Unfortunately, villagers have hunted down his father's body. Inuyasha and the gang rush on over with Kanta, and are surprised when they see Sesshomaru on the scene.
 24m 9s
 Hosenki and the Last Shard
The area between this world and the next, where Sacred Jewel shard is, is the demon graveyard where Inuyasha's father's corpse rests. The Black Pearl is needed to go there. Inuyasha visits Totosai. He is reunited with Myoga, whom he asks how to take out the Black Pearl.
 24m 9s
 Bizarre Guards at the Border of the Afterlife
Inuyasha and the gang arrive in the land of fire. They discover a giant gateway within a cave in the mountains. This is the gateway to the area between this world and the next, but it is blocked by Gozu and Mezu, the gate's guardians.
 24m 9s
 The Fiery Bird Master, Princess Abi
When the gateway in the Land of Fire opened, Kagome sensed the presence of the Sacred Jewel shard. Inuyasha and the gang go looking for a different way to get to the area between this world and the next.
 26m 22s
 The Tragic Love Song of Destiny, Part 1
When Kikyo's younger sister, Kaede, was still a little girl, Kikyo entrusted her with a corrupt Sacred Jewel, which was removed from the body of the Mistress centipede. Kikyo's duty was to purify the jewel. She began to fight demons who were after the jewel.
 24m 20s
 The Tragic Love Song of Destiny, Part 2
When Kikyo's younger sister, Kaede, was still a little girl, Kikyo entrusted her with a corrupt Sacred Jewel, which was removed from the body of the Mistress centipede. Kikyo's duty was to purify the jewel. She began to fight demons who were after the jewel.
 24m 9s
 The Single Arrow of Chaos
In order to defeat Naraku, Kagura looks for Sesshomaru. She appears before Rin and Jaken, but Sesshomaru is away. Kagura thinks that Naraku's weakness is the other half of Hakudoshi. Meanwhile, the other half of the baby has entered a human castle with Kanna's help.
 24m 9s
 The Mysterious Light that Guides the Saint
Kagome and the others sense Kikyo's presence from the purifying arrow. Meanwhile, Abihime attacks the village. The saint returns and wipes out the demon birds with her purifying arrows. Abihime retreats. Inuyasha and the others arrive, but it is after the saint has left to destroy the birds' nest.
 24m 9s
 Kagome's Instictive Choice
The other half of Hakudoshi, Naraku's baby, is being hidden in a human castle by Kanna. Kohaku appears in the castle town. Meanwhile, Kagome follows a shinidamachu to a waterfall basin and finds Kikyo. Kikyo has succumbed to Naraku's miasma.
 24m 9s
 Protect and Plunder!
Abihime and Tekkei sense that people keep interfering with them ever since they begame involved with Naraku. They become suspicious of a castle that Naraku's demons don't go near, and decide to invade it. Kohaku is in the castle, and he has been ordered to protect the other half of Hakudoshi.
 24m 9s
 The Cruel Reunion of Fate
Abihime dislikes Naraku, and has attacked a castle belonging to humans inolved with Naraku. Kanna and Kohaku are there and have secretly been protecting Hakudoshi's other half. Naraku senses that the castle is going to fall, and orders Kohaku to kill those arround him and steal the baby.
 24m 33s
 The Demon Linked with the Netherworld
Kikyo is reunited with Inuyasha. She advises him not to take Kagome with him, because Naraku will go to the other world and use Kagome's eyes to find the Sacred Jewel shard. Kikyo plans to go in her place. Inuyasha is worried that she has not completely healed, and stops her.
 24m 33s
 The Demon Protector of the Sacred Jewel Shard!
Naraku has cut off Tekkei's head. He heads to the place between this world and the next on the river of blood that comes gushing out. Inuyasha and the gang go after him, even though they know it's a trap. Sesshomaru arrives one moment too late.
 24m 33s
 Final Battle at the Gravesid: Sesshomaru Versus Inuyasha!
Kagura leads Sesshomaru to the Land of Fire. Sesshomaru uses the Tenseiga to stave off Gozu and Mezu, and goes to the demon graveyeard in the area between this world and the next. Meanwhile, Naraku sees that Kagome's purifying arrows have broken Hosenki's diamond armor.
 24m 33s
 Destroy Naraku with the Adamant Barrage!
Naraku hs stolen the final shard from Hosenki. Hosenki tells Inuyasha to kill him. Inuyasha's Tessaiga gains the demon powers of any powerful demon it cuts. Naraku begins to spew miasma from the cut that he received from Sesshomaru.
 24m 33s
 Stampede of the Countless Demon Rats!
Hakudoshi releases a swarm of Zushi Rats into a field in order to lure Kikyo out. The rats devour villages. They don't die even if they're cut, and continue to multiply. Inuyasha and the gang encounter the rats. In order to exterminate the rats, they need to destroy the Zushi that is spewing the rats.
 24m 33s
 Kohaku's Decision and Sango's Heart
In order to reach Naraku's heart and get his revenge, Kohaku cannot defy Naraku. Sango doesn't know the truth, and fights him so that she can destroy the Zushi that Kohaku is protecting. Meanwhile, the demons that Hakudoshi has released have withered the evil luring tree.
 24m 33s
 The Lucky but Two-Timing Scoundrel!
Inuyasha tekks Kaede that Kikyo is still alive. Kagome is depressed that Inuyasha still has feelings for Kikyo. She goes back to the present day without telling Inuyasha. Inuyasha follows Kagome to her house, but Kagome destroys the bike that she had received from her mother.
 24m 33s
 Miroku's Past Mistake
Miroku cured a girl named Shima of a disease two years ago. Shima is troubled when the lord of the lake, where she got water to make an infusion of herbs, asks her to marry him. She is reunited with Miroku and asks him for help.
 24m 33s
 Forever with Lord Sesshomaru
Children have been kidnaped, and a group of priests led by Ungai, a powerful priest who hates demons, go after the demon who did it. Ongokuki, a demon that gathers children with a flute, also kidnaps Rin. Inuyasha and the gang run into Jaken, who is looking for Rin and Sesshomaru.
 24m 33s
 Kohaku, Sango and kirara: The Secret Flower Garden
The demon exterminator's village is Sango and Kohaku's hometown. Kirara visits it by herself and fondly remembers the days when she played with Sango and Kohaku.
 24m 33s
 Possessed by a Parasite: Shippo, Our Worst Enemy
Shippo is possessed by a parasite pupa, and causes mischief. Kagome and the others want to catch him before the villagers exterminate him, but Miroku, Sango, and Kirara fall for Shippo's birdlime demon fox technique and fail to catch him. Inuyasha, who had a keen nose, runs into trouble when he is hit by a stink bomb.
 24m 33s
 The Ultimate Key to Defeating Naraku
Inuyasha and the gang meet Gakusanjin, and learn that Naraku has stolen the Fuyouheki, a guardian stone. Gakusanjin trusts Inuyasha and the gang, and gives them a crystal of demon energy. The crystal's demon energy will disappear if it gets near the Fuyoheki.
 29m 18s
 The Bond Between Them, Use the Sacred Jewel Shard! Pt. 1
Gakusanjin is defeated by the child ascetic. Inuyasha and the gang suspect it is Naraku's doing. They follow the ascetic and arrive at a temple in the holy mountain to the east. A strange man by the name of Goryomaru is there. He does not react when Inuyasha and the gang mention Naraku's name.... Part 1
 20m 56s
 The Bond Between Them, Use the Sacred Jewel Shard! Pt. 2
Gakusanjin is defeated by the child ascetic. Inuyasha and the gang suspect it is Naraku's doing. They follow the ascetic and arrive at a temple in the holy mountain to the east. A strange man by the name of Goryomaru is there. He does not react when Inuyasha and the gang mention Naraku's name.... Part 2
 24m 8s
 Naraku’s Heart
Hakudoshi is scheming to take Naraku’s place. He steals Kagome’s Shikon Jewel shards and entices Kagura to betray Naraku. In the meantime, Inuyasha and his friends discover the whereabouts of Naraku’s heart, the Infant, from Hakudoshi.
 24m 9s
 Kagura’s Wind
Upon healing her wounds inflicted by Naraku, using Midoriko’s soul, Kikyo runs into Inuyasha again and reveals the secret to destroying Naraku. Meanwhile, Koga gears up to retrieve the ultimate weapon, the Goraishi, at the wolf demon tribe’s burial ground. Around that time, Moryomaru, who faced off against Sesshomaru, detects the smell of Kagura’s blood…
 24m 9s
 Meido Zangetsuha
It is the day of the annual Fox Demon Promotion Exam. Miroku and his friends get stuck taking the tests. Shippo makes fun of Inuyasha and climbs in rank. In the meantime, Totosai decides to forge the Tenseiga again upon visiting Sesshomaru. The Tenseiga is a source of great power during battle, and Sesshomaru learns a few new tricks.
 24m 9s
 Dragon-Scaled Tetsusaiga
The swordsmith Toshu forged a demon-blade using one of Ryujin’s scales, and the Dakki was born. Every time Inuyasha tries to attack, he is undermined by demonic energy. The wielder of the Dakki is trying to steal the Tetsusaiga’s demon power. Will Inuyasha be able to win against the Dakki!? In the meantime, Koga faces off against Moryomaru in an attempt to save the children of the Wolf-Demon tribe who had been afflicted by the poisonous moth.
 24m 8s
 The Great Holy Demon Spirit’s Test
The Tetsusaiga has attained the power of the dragon scales. In order to be able to quickly use the demonic power well, Inuyasha has no choice but to go through training. Totosai tells Inuyasha to go see the Great Holy Demon Spirit, but when the group arrives, they find that the Great Holy Demon Spirit has had his liver taken by a demon, and all of the villagers have turned into demons.
 24m 9s
 The End of Moryomaru
Inuyasha and Koga arrive at the scene of Moryomaru and Naraku’s fight. But Moryomaru, who wants his Shikon shards, catches Koga. Meanwhile, Naraku draws up a secret plan to intimidate his heart, the Infant, residing within Moryomaru. What will be the outcome of their confrontation…?
 24m 8s
 Mausoleum of Mount Azusa
Kikyo has been contaminated by Naraku’s spider web. In order to save her, Inuyasha and Kagome need the bowstring kept in Mount Azusa’s mausoleum. Kagome rushes off to Mount Azusa to retrieve the bowstring and save Kikyo. Meanwhile, Sesshomaru appears before Byakuya of the Dreams, who is on a quest for Kohaku’s Shikon shards.
 24m 9s
 Among the Twinkling Stars
Kikyo tries to purify Naraku and his Shikon shards. She also tries to purify Midoriko’s will that controls the shards in Koga’s legs. Kikyo tells Kagome, “Protect the last shard, Koga’s light,” but what are her real intentions? And can Inuyasha protect Kikyo from Naraku?!
 24m 9s
 Sesshomaru in the Underworld
Sesshomaru asks his mother how he can expand Tenseiga’s Meido, the Path to the Underworld. In response, his mother uses the Meido stone that Sesshomaru’s father gave her. However, Kohaku and Rin are swallowed by a giant dog and are taken away to the Path to the Underworld. Sesshomaru chases after them and steps foot into the Meido , from which there is no coming out alive.
 24m 9s
 Flowers Drenched in Sadness
The Flower Prince is a demon that feasts on saddened or anguished hearts. Dazzled by the flower’s fragrance, Inuyasha is entangled in a fake dream. Kagome shoots the Flower Prince with an arrow adorned with the Beads of Demon Repulsion, but… Plus, the Mirror Demon and Kanna are on the move.
 24m 9s
 Kanna’s Gravestone
The Mirror Demon steals Tetsusaiga’s demonic energy. Inuyasha counterattacks, despite enduring some fierce blows, but all of his attacks aimed at the Mirror Demon end up being taken by Kanna. Naraku orders Kanna to defeat Inuyasha no matter what, even if it means sacrificing her life. What is driving Kanna to risk her life in this fight?
 24m 9s
 Sango's Feelings, Miroku's Resolve
In order to defeat the demons, Sango coats Hiraikotsu with poison. To cleanse it of the poison, the Master of Potions says she must defeat the demon inside the jug. Sango takes on the challenge. Meanwhile, the Master of Potions asks Miroku, whose Wind Tunnel is causing him pain, whether he would like a painkiller…
 24m 9s
 A Complete Meido
Shishinki, the Ogre of Death, appears before Sesshomaru, telling him that Inuyasha and Sesshomaru’s father stole his Meido Zangetsuha in a battle. Shishinki says that Tenseiga is an incomplete sword that is merely a cast-off piece of Tetsusaiga, and that Sesshomaru will never be able to perfect Meido Zangetsuha. Then, a secret involving Inuyasha’s Tetsusaiga is revealed!
 24m 8s
 In Pursuit of Naraku
Sesshomaru is enraged when he learns the secret behind Tenseiga. Totosai tries to persuade Sesshomaru that he will surpass his father once he is able to abandon his attachment to the sword as well as his hatred of Inuyasha. Meanwhile, Naraku relentlessly chases after Kohaku’s Shikon shard and learns that Kikyo left behind something worth fearing.
 24m 9s
 Hitomiko’s Barrier
The priestess Hitomiko lost her life at Naraku’s hands. But she comes back to life and locks Kagome within a barrier. Then, the true spiritual power of Mount Azusa’s bow reveals itself!
 24m 9s
 Magatsuhi’s Evil Will
Inuyasha and Kaede try to find out what is sealing off Kagome’s powers. Meanwhile, the Shikon Jewel’s evil will, Magatsuhi, borrows the body of Naraku’s demons and attacks Sesshomaru’s group, causing Totosai to sense that Sesshomaru is in serious danger!
 24m 8s
 The Day of Days
Kohaku remains unconscious after being stared down by Magatsuhi, the evil will. Kagome is worried, but she has to buckle down and study for her entrance exams, so she decides to return home. But on the day of the entrance exam to her top-choice high school, Inuyasha comes to get her. Will Kagome make it to her exam?
 24m 9s
 Kohaku’s Shard
Sesshomaru chases after the evil will, Magatsuhi. But it’s only part of a trap set up by Byakuya of the Dreams. Magatsuhi finds Kohaku lying unconscious, and he tries to deliver his Shikon shard to Naraku. Miroku tries to stop him by sucking the evil will with his Wind Tunnel, but doing so causes him to collapse. In the meantime, Sango and Inuyasha try to catch up to Kohaku…
 24m 8s
 When the Jewel is Whole
Naraku is after the last Shikon shard, and he takes Kagome hostage. Inuyasha’s gang engages in battle. Kohaku uses Kagome’s Sacred Arrow and Kikyo’s light to fight Naraku, but his Shikon shard is stolen in the process, and he breathes his last. Sango is overcome with grief...
 24m 8s
 Inside Naraku
Kagome graduates from middle school and returns to the feudal era. Shippo and Kohaku stay at Kaede’s village, while the rest of the gang heads out to battle Naraku. Naraku, transformed into a giant spider, is already waiting for them when they arrive. Sesshomaru leads the group inside Naraku’s body…
 24m 8s
 Naraku: Trap of Darkness
Inuyasha’s heart is devoured by the Shikon Jewel’s poison, and he turns into his demon form. He hurts Kagome, and the darkness in his heart takes control of him. Miroku doesn’t want to use the Wind Tunnel around Sango for fear of endangering both their lives, so he decides to travel alone. The group ends up getting caught in Naraku’s trap!
 24m 8s
 Naraku: Trap of Light
Kagome’s spiritual powers are restored, and divine light is revived in Naraku’s Shikon Jewel. However, Naraku uses this as a decoy to lure Sango into his trap. Naraku pressures them to kill Rin in order to save Miroku. And then, Byakuya steals Inuyasha’s Meido Zangetsuha’s demon power!
 24m 9s
 Naraku’s Uncertain Wish
Naraku has been living as a demon despite having a human heart. While fighting him, Kagome asks about his true wish. Then, Inuyasha’s Meido Zangetsuha explodes on Naraku! Sesshomaru’s Bakusaiga is on its way to destroying Naraku… What is the destiny of Inuyasha and his friends?!
 24m 9s
 Thoughts Fall Short
Naraku heads for the Bone Eater’s Well and vanishes! Before disappearing, Naraku makes his last wish for Kagome, injured at the hands of Byakuya, to be swallowed into Meido, the Path to the Underworld. Inuyasha is at a loss, but then jumps into Meido himself. But the Bone Eater’s Well disappears in both the feudal era and in the modern day! Where has Kagome gone?
 23m 37s
 Toward Tomorrow
When the last person to obtain the Shikon Jewel makes the one correct wish, the jewel will be purified and disappear entirely from this world. “Don’t wish anything until I’m there!” Inuyasha looks for Kagome… Will Inuyasha and Kagome be able to see tomorrow together?